AutoScaling [Part 02]
▶ 지난 포스팅
AutoScaling [Part 01] — 하늘을 나는 펭귄
AutoScaling [Part 01]
01. HPA(Horizon Pod Autoscaler)Pod에 대한 Client Connection이 많아지거나 적어지면 리소스 정보를 확인하여 Pod를 증가시키거나 축소시키는 기술Scal in/out 을 통해 파드 수를 늘리거나 줄이는 방법Metric에 따
ssunghwan.tistory.com
01. CA (Cluster AutoScaler)
✅ EKS 에서 사용되는 AutoScaler로 Cluster의 작업 부하에 따라 자동으로 노드를 스케일링하는 서비스
- Node Scaling : Cluster가 더 많은 리소스를 필요로 하면 노드를 추가, 리소스 사용량이 줄어들면 노드를 제거.
- 스케줄링 최적화 : 노드를 추가/제거 하면서 파드 스케줄링 최적화. Pod가 필요한 리소스를 적시에 얻을 수 있다.
- 비용 최적화 : 노드의 수를 최적화 함으로써 Cluster의 비용을 최적화. 노드가 불필요할 때 제거하여 리소스 절약
1-1. IAM 역할 생성 및 연결
✅ Cluster AutoScaler가 AWS API를 호출할 수 있도록 IAM 역할을 생성하고, 노드그룹과 연결.
CA를 사용하려면 아래와 같은 IAM 역할과 Policy가 필요하다.
cluster 에 대한 역할 및 권한 : EKS 서비스가 다른 AWS 서비스를 호출하는 데 사용.
NodeGroup 에 대한 역할 및 권한 : Node Group의 EC2 Instance가 다른 AWS 서비스를 호출하는 데 사용
AutoScaler에 대한 역할 및 권한 : CA가 필요에 따라 노드를 확장하거나 축소시킬 때 필요한 AWS API를 호출하는 데 사용
■ IAM Policy를 json 형식으로 생성 | AWS Console → IAM → 정책 → 생성 → json 선택

아래와 같은 json 형식으로 policy 생성
{
    "Version": "2012-10-17",
    "Statement": [
        {
            "Action": [
                "autoscaling:DescribeAutoScalingGroups",
                "autoscaling:DescribeAutoScalingInstances",
                "autoscaling:DescribeLaunchConfigurations",
                "autoscaling:DescribeTags",
                "autoscaling:SetDesiredCapacity",
                "autoscaling:TerminateInstanceInAutoScalingGroup",
                "ec2:DescribeLaunchTemplateVersions"
            ],
            "Resource": "*",
            "Effect": "Allow"
        }
    ]
}
옵션 설명은 펼쳐보자!
정책 이름을 작성 후, 생성!

■ IAM Role 생성 → Policy와 연결 | AWS Console → IAM→ 역할 → 생성

아까 생성했던 Policy 검색 → 선택

역할 이름 작성 후 마지막으로 검토하는 단계 → 역할 생성


■ IAM Role 편집 - 신뢰관계 설정
✅ “sts:AssumeRoleWithWebIdentity” 작업을 수행할 수 있으려면 신뢰 관계 정책이 필요하다.
아래와 같은 작업은 Cluster AutoScaler가 AWS AutoScaling Group을 관리하는 데 필요한 정책임.
- EKS에서 OIDC ARN을 복사해오자.
여기서 OIDC란, 사용자 인증을 위한 표준 프로토콜이며 OIDC를 활용해서 Kubernetes ServiceAccount와
AWS IAM Role을 연결할 수 있다.

- 신뢰관계 편집 | AWS Console → IAM→ 역할 → Role Name 선택 → 신뢰관계 → 정책 편집

아래와 같이 코드를 수정하자.
{
  "Version": "2012-10-17",
  "Statement": [
    {
      "Effect": "Allow",
      "Principal": {
        "Federated": "arn:aws:iam::593276723488:oidc-provider/oidc.eks.ap-northeast-2.amazonaws.com/id/B10C17179DB5AA815DC40E23F3F9B246"
      },
      "Action": "sts:AssumeRoleWithWebIdentity",
      "Condition": {
        "StringEquals": {
          "oidc.eks.ap-northeast-2.amazonaws.com/id/B10C17179DB5AA815DC40E23F3F9B246:sub": "system:serviceaccount:kube-system:cluster-autoscaler"
        }
      }
    }
  ]
}arn:aws:iam::593276723488:oidc-provider : AWS 계정 번호, OIDC 공급자를 나타내는 부분
amazonaws.com/id/B10C17179DB5AA815DC40E23F3F9B246 : EKS Cluster의 OIDC 공급자를 나타내는 ARN이며, 고유 식별자를 의미.
1-2. eksctl을 사용하여 IAM Role, Policy 연결
💁♂️ 내용에 앞서, AWS의 IAM Role과 Kubernetes ServiceAccount는 다르다.
- AWS IAM role : AWS 리소스가 다른 AWS 서비스를 사용할 수 있도록 하는 IAM의 한 부분
- IAM 역할은 특정 권한을 가진 정책을 연결하여 AWS 서비스가 다른 AWS 서비스를 호출할 수 있게 한다.
- Kubernetes 서비스 계정 : 쿠버네티스 내의 Pod가 API를 안전하게 Access 할 수 있게 하는 인증 매커니즘.
- 특정 namespace 안에 존재하며, RBAC 정책을 사용하여 Kubernetes 리소스에 대한 접근권한을 부여
■ IAM Service 계정 생성
IAM Service 계정이란? AWS IAM role + Kubernetes Service Account를 합쳐서, IAM Service Account.
- EKS가 AWS 리소스에 접근 하기 위한 권한을 부여

eksctl create iamserviceaccount \
  --cluster=vintagepub-cluster \
  --namespace=kube-system \
  --name=cluster-autoscaler \
  --attach-policy-arn=arn:aws:iam::593276723488:policy/ClusterAutoScaler-Policy \
  --override-existing-serviceaccounts \
--approveeksctl create iamserviceaccount \
--cluster=<클러스터 이름> \
--namespace=kube-system \
--name=cluster-autoscaler \
--attach-policy-arn=<생성한 policy의 ARN> \
--override-existing-serviceaccounts \
--approve
이 형식으로 작성하면 된다.
- ServiceAccount가 잘 생성되었는지 확인.

kubectl -n kube-system get sa cluster-autoscaler
kubectl -n kube-system describe sa cluster-autoscaler
- ServiceAccount가 잘 맵핑되었는지 확인

삭제하는 방법은 아래를 참고하자.
eksctl delete iamserviceaccount \
--cluster=[cluster name] \
--namespace=kube-system \
--name=cluster-autoscaler $aws iam get-role --role-name [IAM role name]
02. Cluster AutoScaler 설치 및 구성
설치하기에 앞서, kubernetes version 과 AutoScaler version이 호환이 되야 하므로 버전 확인
kubectl version --short
Client Version: v1.21.2-13+d2965f0db10712
Server Version: v1.27.9-eks-5e0fdde
WARNING: version difference between client (1.21) and server (1.27) exceeds the supported minor version skew of +/-1

# Client Version: 이는 kubectl CLI 도구의 버전을 나타냅니다. kubectl은 쿠버네티스 클러스터와 상호 작용하기 위한 커맨드 라인 인터페이스(CLI) 도구입니다.
# Server Version: 이는 쿠버네티스 클러스터(서버)의 버전을 나타냅니다. 즉, 현재 실행중인 쿠버네티스 API 서버의 버전입니다.
Kubernetes Github 홈페이지는 아래와 같으며, 본인 버전을 참고 하여 image 버전 복사!!!!
https://github.com/kubernetes/autoscaler
GitHub - kubernetes/autoscaler: Autoscaling components for Kubernetes
Autoscaling components for Kubernetes. Contribute to kubernetes/autoscaler development by creating an account on GitHub.
github.com
필자 버전 : registry.k8s.io/autoscaling/cluster-autoscaler:v1.27.5
■ CA를 생성하기 위해서는 role, serviceaccount을 생성하여 binding을 시켜줘야한다.
- 참고 사항 : eks에서 생성해준 iam serviceaccount와 현재 생성하는 serviceaccount와는 다르다.
- kubernetes 내부에서 CA가 AWS API에 접근하기 위해 권한을 부여하는데에 사용하는 서비스 계정.
아래와 같이 SA를 yaml 형식으로 생성하자. [ 코드 옆에 붙어있는 주석을 잘 확인 후 수정 바랍니다 ]
vi cluster-autoscaler.yaml

---
apiVersion: v1
kind: ServiceAccount
metadata:
  annotations:
    eks.amazonaws.com/role-arn: arn:aws:iam::593276723488:role/ClusterAutoScaler-role      # IAM 역할 ARN 복사해오기.
  labels:
    k8s-addon: cluster-autoscaler.addons.k8s.io
    k8s-app: cluster-autoscaler
  name: cluster-autoscaler
  namespace: kube-system
---
apiVersion: rbac.authorization.k8s.io/v1
kind: ClusterRole
metadata:
  name: cluster-autoscaler
  labels:
    k8s-addon: cluster-autoscaler.addons.k8s.io
    k8s-app: cluster-autoscaler
rules:
  - apiGroups: [""]
    resources: ["events", "endpoints"]
    verbs: ["create", "patch"]
  - apiGroups: [""]
    resources: ["pods/eviction"]
    verbs: ["create"]
  - apiGroups: [""]
    resources: ["pods/status"]
    verbs: ["update"]
  - apiGroups: [""]
    resources: ["endpoints"]
    resourceNames: ["cluster-autoscaler"]
    verbs: ["get", "update"]
  - apiGroups: [""]
    resources: ["nodes"]
    verbs: ["watch", "list", "get", "update"]
  - apiGroups: [""]
    resources:
      - "namespaces"
      - "pods"
      - "services"
      - "replicationcontrollers"
      - "persistentvolumeclaims"
      - "persistentvolumes"
    verbs: ["watch", "list", "get"]
  - apiGroups: ["extensions"]
    resources: ["replicasets", "daemonsets"]
    verbs: ["watch", "list", "get"]
  - apiGroups: ["policy"]
    resources: ["poddisruptionbudgets"]
    verbs: ["watch", "list"]
  - apiGroups: ["apps"]
    resources: ["statefulsets", "replicasets", "daemonsets"]
    verbs: ["watch", "list", "get"]
  - apiGroups: ["storage.k8s.io"]
    resources: ["storageclasses", "csinodes", "csidrivers", "csistoragecapacities"]
    verbs: ["watch", "list", "get"]
  - apiGroups: ["batch", "extensions"]
    resources: ["jobs"]
    verbs: ["get", "list", "watch", "patch"]
  - apiGroups: ["coordination.k8s.io"]
    resources: ["leases"]
    verbs: ["create"]
  - apiGroups: ["coordination.k8s.io"]
    resourceNames: ["cluster-autoscaler"]
    resources: ["leases"]
    verbs: ["get", "update"]
---
apiVersion: rbac.authorization.k8s.io/v1
kind: Role
metadata:
  name: cluster-autoscaler
  namespace: kube-system
  labels:
    k8s-addon: cluster-autoscaler.addons.k8s.io
    k8s-app: cluster-autoscaler
rules:
  - apiGroups: [""]
    resources: ["configmaps"]
    verbs: ["create", "list", "watch"]
  - apiGroups: [""]
    resources: ["configmaps"]
    resourceNames: ["cluster-autoscaler-status", "cluster-autoscaler-priority-expander"]
    verbs: ["delete", "get", "update", "watch"]

---
apiVersion: rbac.authorization.k8s.io/v1
kind: ClusterRoleBinding
metadata:
  name: cluster-autoscaler
  labels:
    k8s-addon: cluster-autoscaler.addons.k8s.io
    k8s-app: cluster-autoscaler
roleRef:
  apiGroup: rbac.authorization.k8s.io
  kind: ClusterRole
  name: cluster-autoscaler
subjects:
  - kind: ServiceAccount
    name: cluster-autoscaler
    namespace: kube-system

---
apiVersion: rbac.authorization.k8s.io/v1
kind: RoleBinding
metadata:
  name: cluster-autoscaler
  namespace: kube-system
  labels:
    k8s-addon: cluster-autoscaler.addons.k8s.io
    k8s-app: cluster-autoscaler
roleRef:
  apiGroup: rbac.authorization.k8s.io
  kind: Role
  name: cluster-autoscaler
subjects:
  - kind: ServiceAccount
    name: cluster-autoscaler
    namespace: kube-system

---
apiVersion: apps/v1
kind: Deployment
metadata:
  name: cluster-autoscaler
  namespace: kube-system
  labels:
    app: cluster-autoscaler
spec:
  replicas: 1
  selector:
    matchLabels:
      app: cluster-autoscaler
  template:
    metadata:
      labels:
        app: cluster-autoscaler
      annotations:
        prometheus.io/scrape: 'true'
        prometheus.io/port: '8085'
    spec:
      priorityClassName: system-cluster-critical
      securityContext:
        runAsNonRoot: true
        runAsUser: 65534
        fsGroup: 65534
        seccompProfile:
          type: RuntimeDefault
      serviceAccountName: cluster-autoscaler
      containers:
        - image: registry.k8s.io/autoscaling/cluster-autoscaler:v1.27.5      # 이미지 버전 수정
          name: cluster-autoscaler
          resources:
            limits:
              cpu: 100m
              memory: 600Mi
            requests:
              cpu: 100m
              memory: 600Mi
          command:
            - ./cluster-autoscaler
            - --v=4
            - --stderrthreshold=info
            - --cloud-provider=aws
            - --skip-nodes-with-local-storage=false
            - --expander=least-waste
            - --node-group-auto-discovery=asg:tag=kubernetes.io/cluster/vintagepub-cluster      # AutoScalingGroup 에서 NodeGroup에 대한 Tag 입력
            - --balance-similar-node-groups
            - --skip-nodes-with-system-pods=false
          volumeMounts:
            - name: ssl-certs
              mountPath: /etc/ssl/certs/ca-certificates.crt # /etc/ssl/certs/ca-bundle.crt for Amazon Linux Worker Nodes
              readOnly: true
          imagePullPolicy: "Always"
          securityContext:
            allowPrivilegeEscalation: false
            capabilities:
              drop:
                - ALL
            readOnlyRootFilesystem: true
      volumes:
        - name: ssl-certs
          hostPath:
            path: "/etc/ssl/certs/ca-bundle.crt"
■ apply 후 로그 확인
kubectl apply -f clster-autoscaler.yaml
kubectl -n kube-system logs -f deployment.apps/cluster-autoscaler
■ 동작중인 pod 확인
kube-system namespace에 있는 CA에 대한 Pod의 Status 확인 가능.

2-1. 테스트용 Pod 배포
- 현재 가용중인 node의 Resource 사용량 확인
kubectl top node
kubectl describe nodes [node name]

■ AWS ASG (AutoScaling Group) 설정
→ 편집하여 최대 늘릴수 있는 node 수를 수정하자.

★ ★ 노드가 3개로 늘어나도록 환경 구성
노드들의 리소스 스펙, 현재 사용량을 확인하여 테스트 Pod 리소스를 조정해야 한다 [ 중요 ]
- Pods Resource 조정
예를 들어, 노드의 사용 가능한 CPU를 1930m으로 가정하고, 현재 사용 중인 CPU가 341m라면,
파드의 CPU 요구량을 약 1600m 미만으로 설정하는 것이 좋습니다. 메모리의 경우,
현재 사용 중인 메모리가 약 1.6Gi이므로, 파드의 메모리 요구량을 약 1.8Gi 이하로 설정하는 것이 좋습니다.
- 참고 사항
- Pod가 요구하는 리소스가 노드의 총 용량을 초과하는 경우, Pod는 스케줄링되지 않습니다.
- Nodes를 새로 프로비저닝하거나 확장하는 것은 즉각적인 과정이 아님.
- 새 노드가 준비되기까지 시간이 걸리므로, 파드는 'Pending' 상태에 머무를 수 있습니다.
■ test pod 배포
vi ca-testpod.yaml

apiVersion: v1
kind: ReplicationController
metadata:
  name: nginx
spec:
  replicas: 5
  selector:
    app: nginx
  template:
    metadata:
      labels:
        app: nginx
    spec:
      containers:
      - name: nginx
        image: nginx
        resources:
          requests:
            cpu: 1000m
            memory: 1Gi
          limits:
            cpu: 1000m
            memory: 1Gi
- Pods 배포
kubectl apply -f ca-testpod.yaml
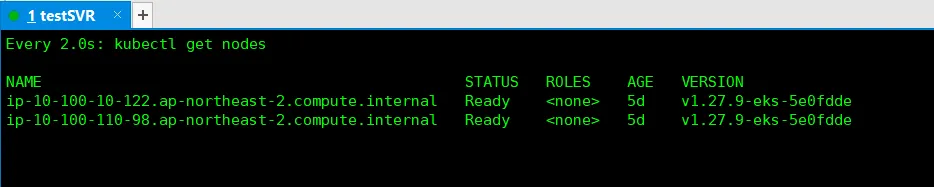
- Nodes가 Scheduling 되는지 확인
watch kubectl get nodes
kubectl top nodes
Resource가 큰 Pod들이 생성되고 30초 내로 Node 스케줄링이 이루어짐.


- 테스트를 마치고, pod 삭제
kubectl delete -f ca-testpod.yaml
kubectl get pods
삭제 후 pods를 확인해봐도, 여전히 nodes 수가 원상태로 바로 복구가 되지 않는다.
이유는? 일정시간 동안 Resource 용량이 큰 Pods들이 재생성 될까봐 CA는 아직 Scale down 하지 않고 대기상태.
별도의 설정이 없을 경우 일정시간의 default값은 10m 이다.
■ CA 로그 확인
kubectl -n kube-system logs -f deployment.apps/cluster-autoscaler
10분이 지난 후 아래와 같이 Scale down 진행중.

성공적으로 Scale down 진행 완료 (사용하지 않는 nodes 삭제)

원상복구 완료.
다음 포스팅은 AutoScaling 부문의 최근 기술인 Karpenter 로 찾아뵙겠습니다!